Disclosure: Links marked with * are Affiliate Links. As an Amazon Associate, I earn from qualifying purchases if you decide to make a purchase through these links – at no cost for you!
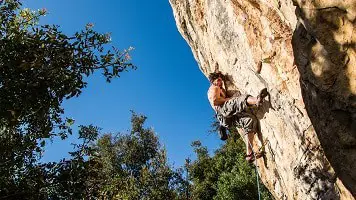
Solo climbing is first of all a hobby that combines numerous positive aspects: You are out in the fresh air, unless you are climbing indoors, and you are physically active. In the process, you use all the muscles that are quickly underutilized in everyday life. In addition, you strengthen your hand-eye coordination during solo climbing.
Not to be ignored is the mental strength, which you acquire along the way. You train your mental flexibility, your mental resilience, as well as your flexibility, strength endurance, maximum strength and whole-body stabilization power.
If these are not good reasons to immediately clip in the rope and climb the nearest wall. But it’s not quite that easy, because there are a few things to keep in mind when solo climbing. In the following article, we’ll tell you what’s important.
What Does Solo Climbing Mean?
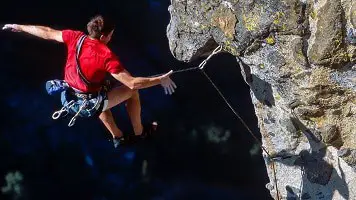
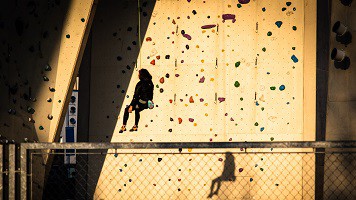
When the term solo climbing is mentioned, it means climbing without a rope partner. However, the climbing itself is practiced with belay equipment and a rope. It is a challenging variant of climbing on rock faces, ice walls or indoor walls.
Solo climbing is definitely not a sport for climbing beginners, because here a lot of experience in handling the vital equipment is required. But also the time factor plays a decisive role in solo climbing: you have to plan significantly more time because you have to perform all the steps yourself, which would otherwise be taken over by your climbing partner.
This applies in particular to the laying of the self-securing systems and the removal of all fuses.
What is the difference to Free Solo?
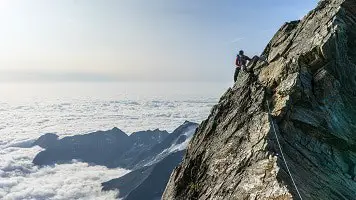
Insofar as the athlete forsakes not only the partner but also the rope when climbing, we are talking about the far more dangerous climbing technique: free solo. Those who want to conquer their rock faces without a climbing partner and without a rope are undoubtedly opting for the purest and most uncompromising form of climbing.
After all, obstructions caused by technical material are almost impossible. However, this variant also harbors the highest potential danger. Any mistake, no matter how small, is very likely to have devastating consequences.
It is not without reason that the free solo is a climbing variant that should be practiced exclusively by the climbers with the strongest nerves, who can also look back on an extensive wealth of experience.
Proper securing has to be learned
The most important thing in solo climbing is self-belaying. Since you don’t have a climbing partner, you have to make sure that you secure yourself in the best possible way to avoid accidents. The most common form of belay is the top-rope belay, which we will introduce to you in more detail below:
Toprope means that the rope you use for self-belaying is already anchored at the top of the climbing target. It is therefore advisable to choose a wall that can be easily climbed from the outside to position the rope.
If you choose a beginner course, you will find that this content is taught first. This style of climbing is the safest way to belay yourself and is very easy to learn.
Choosing the right belay device for solo climbing
For climbing without a partner, the so-called semi-automatic* has proven to be the best. But what does semi-automatic mean in this context?
Provided that the semi-automatic machine is operated correctly with the brake hand principle, it will lock automatically as soon as there is a jerky pull, as would occur during a fall.
The mechanism can be compared with the seat belt in a vehicle: If the brakes are applied heavily, the belt locks and the occupants remain fixed in their seats. When climbing solo, you benefit from significantly more safety in terms of the semi-automatic than is the case, for example, with the half-mast throw. Here, only the brake rope is operated by hand to intercept a potential fall.
But even with semi-automatic machines, the following applies: The hand always remains on the brake cable, as the safety mechanism can also fail.

Related Post:
GriGri vs. ATC | The Ultimate Belay Device Showdown!
What to consider when choosing the rope
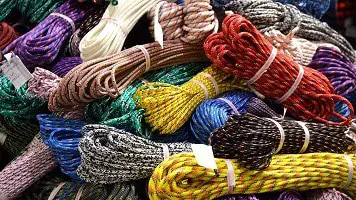
To be able to take off without restrictions when solo climbing, you need a dynamic rope*. These products are characterized by their stretchy properties and are therefore able to absorb the fall energy.
The impact on your body is reduced to a tolerable level. When buying, make sure that the rope meets all the required criteria set by both the European Standard (EN) and the UIAA, the International Climbing Federation.
To distinguish dynamic ropes are as follows:
The single rope is used for sport climbing. In the mountains, on the other hand, the half rope is used if it is a multi-pitch route. If you want to ice climb alone, you need a twin rope. Dynamic ropes usually have a diameter of 8.5 to 11 millimeters and a length of 50 to 80 meters. The length of the rope depends on your needs.
Related Post:
How to Choose the Right Climbing Rope?
Attention: You should never forget to tie a knot at the end of the rope when climbing solo. This will prevent the rope from accidentally slipping through the belay device!
The right clothes: just as important as the equipment
Before you start looking for the right equipment in stores, you should focus on the right clothing, which is at least as important.
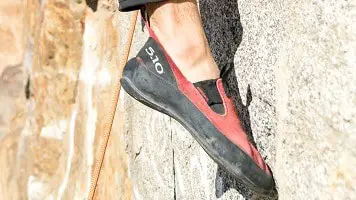
Solo climbers are usually on rough rock faces, which quickly tore a hole in too thin clothing. You should therefore make sure when buying that your clothing for solo climbing has extremely robust properties. But that’s not all, because the right clothing also proves to be breathable and above all comfortable. Of course, your climbing shoes* must also meet certain requirements, which is why you should pay attention to the following aspects when buying them:
So that you can stand cleanly on tiny steps, your climbing shoe should have decent edge strength. Make sure that your toe strength is protected by choosing a model with a firmer midsole. You also need to be able to step well on friction to bring as much sole as possible in contact with the rock face.
Therefore, make sure that you choose a softer climbing shoe, which can convince with a good sole friction. To save torso strength when solo climbing even on very steep walls, you should always pull with your toes and choose your shoes accordingly.
There are many versions on the market with the so-called downturn. These shoes are slightly tilted down at the toe. A stiff sole is also a hindrance when solo climbing. Especially if you have to practice the toehook, that is, pulling with the upper side of your toe box. Ideally, the shoe also features a rubber patch located on the toe box to prevent unwanted slippage.
Since hooking is a common technique that is also used repeatedly in solo climbing, a properly fitting heel is just as important as good rubber. When trying on your shoe, make sure that it doesn’t slip away as soon as you put weight on your foot!
Related Post:
The TOP 6 Best Climbing Shoes for Beginners
Climbing Without a Partner: Only with the Right Equipment
If you want to climb alone, you need not only a good portion of motivation, but also the right equipment. If you have already looked around on the market, you will have noticed: The selection is large and the overview can be lost quickly. Even if you have the basics safely in mind, it is important to deal in detail with the most important utensils for solo climbing. Therefore, we present them individually below.
One thing first: the climbing equipment you can buy must be safe. For this, various certifications and tests are required. The individual parts do not become safer just because the price goes up. So it is not necessary to invest a lot of money in the equipment, so you can rest assured that you have chosen safe equipment.
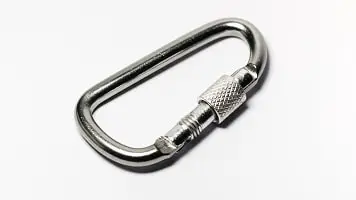
Whether a standardized carabiner* was purchased cheaply or expensively is irrelevant if it is not used properly for solo climbing. Price management is only decisive when it comes to buying used equipment because it is significantly cheaper.
This is not advisable, because as a climber you are responsible for your own equipment and should maintain and check it regularly.
Climbing shoes
While in the past people still tried to climb their walls with clunky stiff mountain boots, today you can get specially designed and skin-tight shoes for solo climbing*.
The special thing about these shoes: Their rubber can be compared to a Formula 1 tire, which ultimately justifies the high purchase price.
The resulting grip is important so that you do not “fly out of the curve” when solo climbing and can hold on to the wall as best as possible.
In terms of designs, the individual manufacturers could not be more different: From firm to soft, with Velcro, for lacing, made of leather or breathable materials, everything is there. If you budget about 80 to 180 bucks for the purchase, you can count on a good model that guarantees you the necessary grip when climbing without a partner.
Related Post:
How to Choose the Right Climbing Shoes?
Climbing harness
Since belayed solo climbing requires a rope, you’ll also need a harness*.
To achieve as much flexibility as possible with this product, you should choose a harness that has adjustable leg loops. In this way, you can vary with the clothing to be worn and in the cold sometimes put on something more than the usual shorts.
In terms of price, the climbing harness ranges from 60 to 160 dollars. It is important that you put the harness through its paces before buying it. The retailer should allow you to “try it out” to avoid making a bad purchase. In a specialty store, trying out the harness for a longer period of time is not a problem, because this is the only way you can judge whether the harness fits well or whether it cuts in somewhere.

Backup device
As hard as it may sound, but the belay device* decides over life and death. Therefore, we would like to go into more detail about this important utensil at this point, although we have already provided the most important information above: Basically, when climbing, it is possible to do without the belay device and use an HMS carabiner* instead.
However, a belay device is essential for solo climbing, which is why you should by no means focus on alternatives. A belay device costs between 15 and 70 dollars. However, the handling should be practiced under qualified guidance, because only the possession can not provide the necessary safety for solo climbing.
Related Post:
GriGri vs. ATC | The Ultimate Belay Showdown!
Closable Carabiner
This allows both self-belaying and the attachment of the belay device. The latter is fixed to the harness, which is why at least one carabiner belongs to the basic equipment of your climbing equipment. Depending on the model and type of closure, you pay between 6 and 30 bucks for a carabiner.
Related Post:
🥇 The best carabiners for a Grigri belay device
Climbing rope
What is popularly called a “climbing rope” is declared by professionals as a “dynamic single rope”. If you are sure that you want to climb regularly, the purchase makes perfect sense.
If you want to practice solo climbing “only” in the hall, you can also rent a rope there. In the indoor area, a rope length of 40 meters* is sufficient.
However, if you want to climb up rock or even ice walls, you need a rope 60 to 80 meters long*, which also has a special coating to prevent the penetration of dirt and moisture.
The climbing rope is offered by the meter. You can expect 1.80 to 4.30 dollars per meter. To be able to transport the rope properly and protect it permanently, an additional rope bag is recommended.
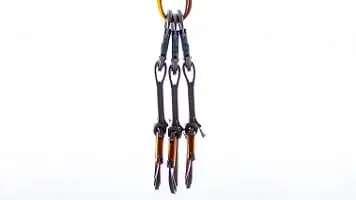
Quickdraws
If you want to solo on the rock, you need quickdraws*.
A set of quickdraws allows you to connect the hooks on the rock with your belay rope. A set of quickdraws costs between 8 and 28 bucks. The price depends on the design and weight.
Climbing helmet
If you are climbing a rock face, you should never do so without a helmet*. On the one hand, the helmet protects you from falling rocks and on the other hand, it also offers you protection in the event of uncontrolled falls into the rope, where a collision with the rock face is also very likely.
Various designs are available on the market. While a helmet with a hard shell simply protects, a model made of soft materials additionally absorbs the impact energy.
When buying a helmet, make sure that it is comfortable to wear and that it fits well. You can expect to pay between 50 and 150 dollars for a climbing helmet.
Related Post:
How to Choose the Right Climbing Helmet?
Chalk
Chalk* is the white magnesium carbonate with which the hands are wetted. The name is nothing more than the English word for chalk. This is used to compensate for the sweating of the fingers when climbing, so that you do not slip.
Although it is a component of the basic equipment, there are probably also specialists who, for example, go climbing in the Elbe Sandstone Mountains without chalk.
However, these are small exceptions that you should not necessarily emulate. In the climbing hall you will not get around the chalk, because the facilities are usually well heated. Chalk is available as a cube, a ball, liquid or powder.

Related Post:
What is Magnesium for Climbing? Climbing Chalk Guide
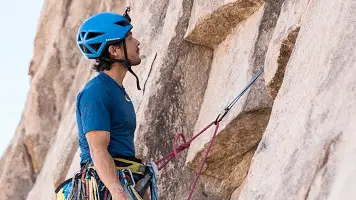
After Toprope comes the Lead Climbing
In this section, we want to introduce you to the theory of lead climbing so that you can develop a good feeling for the practice. Nevertheless, it is advisable to practice the lead in the climbing hall or in a mountaineering club before going to the rock face.
In contrast to the top rope, the rope comes from below during lead climbing. Your task is to hook the rope into the quickdraws by yourself. If you have not yet had the opportunity to practice lead climbing, you should choose a route that you know and that is easy to climb. Only in this way can you concentrate fully on guiding the rope on your body and hooking it into the “exes”.
It becomes dangerous already on the first meters
When lead climbing, you expose yourself to a real risk of falling, the potential of which is already revealed in the first few meters. As a solo climber and lead climber, you are responsible for securing hook after hook into the rock face. Especially when you conquer the first meters, the risk of a fall is high. That’s why you should exercise the utmost caution right at the beginning.
How to hang yourself properly
In order for you to be continuously safe, you need to hang on. And that means on every single quickdraw. But here too, as always, the devil is in the details. As a climber, you tend to hook up as early as possible when you are close to a hook. But that’s exactly the wrong approach because it requires you to pull up lots of rope. And this in turn leads to a high fall depth. Therefore, practice patience and hook the hook only when it is at your chest level.
If you are active in the climbing hall, the quickdraws are usually already anchored in the wall. If you want to climb a rock face, you must bring your own exes. These are hung in the gear loops of your climbing harness. And all of them with the same orientation. It is important that these are hooked in correctly, as this will ensure a clean rope run and reduce rope friction. Both protect the belay chain from adverse loads. If it is a straight route, you can hang the quickdraws as you wish. With diagonally running routes, however, caution is advised.
Rope route
If it is a diagonal course, you have to reckon with certain pitfalls. In order to ensure safety at all times, there are a few points to consider here. On the one hand, sufficient freedom on the way up is important. But the course of the rope also plays a decisive role when falling. If the fall cannot be avoided, it is important to fall freely and not get tangled in the ropes.
Note the following rule of thumb: The rope must always be guided between the body and the rock. On straight routes, the rope belongs between the legs, and on sloping routes, directly next to it. The search for the right holds often proves to be stressful. Nevertheless, you should always keep an eye on the correct rope guidance. Always make sure that the rope never runs above your calf or behind your thigh, so as not to get tangled in the event of a potential fall.
Then an unpleasant injury is not only likely, but even pre-programmed.
Related Post:
How to Lead Climb – Techniques & Equipment
The correct behavior in the event of a fall
If the fall cannot be avoided, the following calculation should be taken into account: The fall distance refers to three times the length of your last intermediate belay. For example, if your last intermediate belay is five meters below you, your fall depth will be around 15 meters.
This means that you fall 10 meters before the rope tightens. The impact elongation is about 25 percent. This and the dynamic belay ensure that another five meters of length are added. The maximum fall factor for lead falls is therefore 1. This is the quotient of the length of the extended rope and the height of the fall.
Related Post:
How to Overcome Your Fear of Heights while Climbing
How to Make a Good Impression when Climbing Solo
Climb out of your legs and not out of your arms!
This way you can save a lot of energy. The energythat you will definitely need when climbing solo. Especially when you’ve been on the wall for a while, you tend to pull yourself up with your arms instead of lifting yourself up with your legs. Always remember: your legs have a lot more strength than your arms. So which limbs do you think get tired faster?
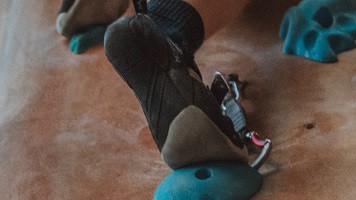
Use your toes
This is also a fatigue phenomenon, to which you quickly surrender. Make sure that you don’t put your whole foot on the step, but only rise it quietly with your toes while lowering your heel. In this way you not only increase the grip, you also save valuable energy. Climbing shoes are specifically designed to transfer power from your legs to the rock face through your toes.
Attention: You have to take care of your safety when climbing! The information on climbtheearth.com only helps you to learn. Before you climb, you should make sure that you have been properly instructed by an expert and that you follow all safety precautions.
Disclosure: This website is the property of Martin Lütkemeyer and is operated by Martin Lütkemeyer. Martin Lütkemeyer is a member of the Amazon Services LLC Affiliate Program, an affiliate advertising program designed to enable Web sites to earn advertising revenue through advertising and linking to Amazon.com. Links marked with * are affiliate links.