Disclosure: Links marked with * are Affiliate Links. As an Amazon Associate, I earn from qualifying purchases if you decide to make a purchase through these links – at no cost for you!
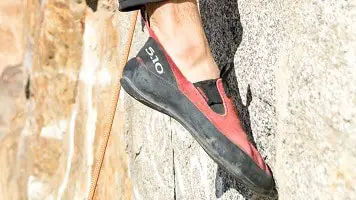
Rock climbing shoes are made for tightly gripping as you ascend up the rocks. There are different climbing shoe types, features, and fits, but the fact remains that these shoes will always fit your foot somewhat snugly. However, if you find yourself getting bunions, blisters, and bruises, then there are some methods to loosening up and stretching your climbing shoes.
First, why not take a look at the different rock climb shoe fits, as the top advice any rock climber will give you is that you have to choose the fit that matches your foot and style of climbing.
Brief Rock Climbing Shoe Guide
There are three rock climbing shoe types:
- Neutral
- Moderate
- Aggressive
A neutral climbing shoe is pretty relaxed and allows for more comfort than the other two types. This is because your toes stay flat inside the shoe. These are the best options if you are just starting out with rock climbing, but experienced climbers still use neutral shoes because of the comfort. However, they are not always good for aggressive climbers taking on steeper mountain courses.
A moderate climbing shoe has a different shape that turns downward to help with technical climbing and speed. These are all-purpose, rubber shoes that work well for climbers enjoying slab routes, long multi-pitch climbs, crack climbs, and overhung sport routes. These shoes fit tighter, but they’ll give you a powerful position for challenging mountain routes. However, they are thinner and made with more rubber. Still, these shoes are more comfortable than the aggressive climbing shoe.
An aggressive climbing shoe has more downward curvature than the previous two shapes. These shoes are made for challenging mountain courses with overhanging climbs. These shoes curve towards the big toe and fit tightly. As the least comfortable to wear, you’ll likely only wear these for single-pitch sport routes and gym courses rather than an all-day multi-pitch route.
Now that you know a little bit about the fit, it’s time to stretch out your shoe so that it molds to your fit. One good point to remember is that all climbing shoes are made from rubber and will typically shrink back after a period of non-use. This means you probably have to continuously stretch your shoes before going on any climbs.
Here’s One Method to Stretch Your Climbing Shoes: Socks
We’re making it look easy, but have you tried filling your climbing shoes with socks? There is a specific way to loosen up your climbing shoes just by balling up socks, washcloths, or other fabric.
Step 1: Stuff Your Climbing Shoes with Socks
In this first step, you’ll ball up socks or other fabric to push into your climbing shoes. You should stuff as many socks as you can into your shoes until every inch inside is pushing against the frame. As you pack the socks in, you should see your shoe stretch to fit.
Step 2: Heat Your Shoes Lightly with Hair Dryer
Some methods actually say to put your shoes in the microwave, but that’s a recipe for disaster. Instead, you can use a hairdryer or leave them in the sun for an hour or two. The hairdryer trick is faster, as you can put the heat up and “dry” your shoes for 1-2 minutes. You should spread the heat over the entire shoe.
Now, check that the shoe is warm before the next step. You should make sure that you don’t spend too long on one spot of the shoe in case it’s a thin rubber that may melt.
Step 3: Stuff More Socks in while the Shoes are Warm
Once shoes are warm, they’ll give a little and you can push in more socks. Now, you’ll let the shoe cool down with the socks inside, allowing it to stretch and form to the fabric inside. Once the shoes feel cool to the touch, take out the socks and try on the shoes to see how they fit. If they’re more comfortable, then you’ve successful stretched out your climbing shoes.
Method 2: Stretch Climbing Shoes in the Freezer
This method takes a little bit more time, but it promises a better stretch overall. You may not want to stretch your climbing shoes with this method if they are only a little bit tight. Freezing your climbing shoes will likely stretch out the toe considerably, but other parts will eventually bounce back due to the rubber material.
Step 1: Fill Plastic Sandwich Bags with Water
You’ll need a couple of sandwich plastic bags with tight seals for this next method. Once you have them, fill each with water so that it can be formed to the inside of your shoe. This means that you don’t want to fill the plastic bag completely full of water because you’ll be packing in multiple bags of water to form to the inside of your shoe.
You’ll need to remove excess air from the bag before you seal them and push into your climbing shoe. The goal here is to make sure that there is no other space inside of your shoe besides the plastic bags filled with water. You’ll need to make sure that the plastic bags push down into the toes of the shoe completely.
Lace-up your shoes once you’ve packed in the plastic bags. Remember this only works if the shoes are packed full to the sole and sides of the shoe with water bags.
Step 2: Place the Shoes Inside the Freezer
You’ll need to freeze your shoes with the water inside for 8 hours minimum. It helps if you leave them overnight before a climb. However, you want to remove them before 12 hours so that they aren’t damaged.
Step3: Remove the Shoes from Freezer and Thaw
You’ll need to wait about 30 minutes to pull the bags out of the shoes. Once they melt slightly, you can wiggle them out of the inside of the shoe. Your climbing shoes may get a little wet, and you’ll want to wait for them to warm up before sliding your foot in. It may take 1 to 2 hours before your shoes are warm enough to wear.
Once your shoes are thawed out, slip them on and see how the fit is. They should be slightly stretched, specifically in the toe area.
Method 3: Soak Your Shoes in the Shower
This method comes from experienced rock climbers who wear their shoes in the shower or soak them previous to a climb. However, there is a specific way to do this so that your shoes aren’t damaged, and you get the maximum stretch before your climb.
Step 1: Put Your Socks on First and then Slide On Climbing Shoes
Before soaking in your shoes, you’ll want to pull on a pair of socks to give yourself some padding. This will help maximize the stretch. Once you’ve got on your socks, pull your climbing shoes on next and lace them up how you like.
Step 2: Get into the Shower with Climbing Shoes On
The next part may feel weird, but this is exactly what climbers do when they want to give their shoes a little stretch. You’ll turn the shower on hot and climb in, letting the water get into your shoes and soaking the fabric down to the rubber soles.
Step 3: Walk Around in Soaked Shoes to Stretch Further
The warm water will already be working to loosen up your shoes. You’ll want to walk around and wiggle your foot as much as possible to stretch your climbing shoes to the max. The longer that you walk around in your wet shoes the faster your shoes will stretch out.
In addition, climbing in shoes that are slightly damp is the best way to stretch them out, according to experienced climbers. This method ensures that the shoe molds to your foot as you are out on the climbing course. However, if your shoes are too wet, it could get slippery. You should use your best judgment on whether your shoes are dry enough to climb.
Step 4: Remove Shoes and Stuff with Newspaper
You can pack newspaper tightly into your shoe down to the toe area, filling the shoe to the maximum amount of space possible. This will help your climbing shoes remain loose instead of tightening back up.
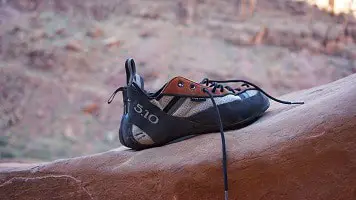
How to Pick the Right Climbing Shoe
Now that you know the different climbing shoe types and how to stretch them, you may be wondering if you have the right type of shoe for what you like to do. You may also want different features that make shoes a better fit or more convenient to wear. Some shoes may also be easier to stretch due to the materials used.
Here are some tips for choosing the right shoe as well as features to look out for in the best climbing shoes.
Related Post:
Top 6 Best Rock Climbing Shoes for Beginners
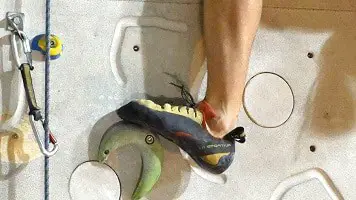
Check the Fit for the Type of Climb
Most climbing shoes fit one to two sizes smaller than your typical shoe size. This is because you need a tight toe grip when you’re climbing.
At the beginning of this article, we talked about the three different types of climbing shoes: neutral, moderate, and aggressive. Neutral shoes are the most comfortable for all-day, multi-level climbing, but aggressive shoes are best for overhangs and difficult single climbs, such as in a gym course.
All-day neutral shoes will be the most comfortable, but you may still want to stretch the toes. Aggressive shoes will be the hardest to keep stretched and may require more after-care once you’re done with your climb. You’ll likely need to stuff your aggressive shoes with socks and newspaper after each climb to ensure that they don’t shrink back.
Climbing Shoe Features to Look For
Footwear Closure
Lace-Up Climbing Shoe: These are pretty versatile and popular. As your foot gets hot and swells up, you can loosen the laces to get more comfortable. However, if you are going for a difficult, steep climb or pitch, then you can tighten up the laces all the way to the toe to increase performance.
Strap or ‘Hook-and-Loop’: This style is more suitable for performance changes on the fly. If you are going bouldering or gym climbing, then you can easily tighten these shoes up with the strap or slip off between climbing.
Slip-On: These are climbing slippers, and they have a simple elastic system that tightens and loosens the shoe depending on the climb. It’s honestly best to only wear slippers in the beginning when you’re training. They don’t have a very stiff sole, so you can climb a bit faster, but these aren’t for aggressive climbers.
Climbing Shoe Materials
Some shoes are made with leather, while others are made from synthetic materials. If you prefer vegan climbing shoes, then you’d go with synthetic options.
Unlined Leather: These shoes are the stretchiest, and you can stretch them a full-size up. You should pick the size that allows your toes to just tap at the end of the shoe’s front. You should be able to see your toe knuckles push up at the leather.
Lined Leather: Typically a leather upper will be lined, which means that it has less stretch. You stretch it up about a half size. Most manufacturers will only line the toes to keep the manufacturing cost low, but this reduces the ability to stretch the shoe. These shoes may stretch more with the freezing method.
Synthetic: If you look at the shoe’s tag and it reads synthetic, then that means it’s not going to stretch as much as a leather shoe. The fit will likely not change at all, but if it only as a synthetic upper where the toe is, then it may give a little bit. Synthetic climbing shoes should be sized more to fit your foot as they typically allow for more breathing room.
Types of Climbing Shoe Lasts
If you are new to climbing, the “last” is a foot-shaped frame around which a shoe is made. This gives a shoe their height and volume, as well as toe dimensions, width, and heel. You’ll notice that most rock climbing shoes have a “slip-lasted” shape, but there are some others out there.
Slip-Lasted Climbing Shoes: These shoes are sensitive and not as tight as other shoes, particularly board-lasted frames. These also do not have an insole, but they will have a midsole that supports the frame. This is located right above the outsole.
Board-Lasted Climbing Shoes: These are the stiffer option, and they don’t have as much leeway as a slip-lasted climbing shoe. However, they are typically shaped to fit the size, which means they work better for all-day wear and won’t get too loose.
In addition to the last, shape, and fit of the shoe, you can also consider climbing shoes in terms of their shape. Different shapes are better for different climbers. Here is a brief guide to choosing the right climbing shoe shape.
Climbing Shoe Shapes
Straight Climbing Shoes: These have a “straight last” or a flat last that is more relaxed and offers a fit that isn’t too tight around the foot. If you are facing a long day of climbing, then these are the best option. These flat last shoes also work best for crack climbing. These typically match a neutral shoe fit.
Asymmetric Climbing Shoes: This shape has a curve, and it places the longest point right over the big toe. This gives the climber more power on the edge of the shoe and also makes it easier to grip a single point on a rock. These shoes typically fall into the moderate or aggressive fit category, depending on how much curve they have.
Downturned Climbing Shoes: These are called “cambered” climbing shoes because their shape bends down to the toes. It is an aggressive shoe fit that works best for climbers who want to use toe and heel hooking for overhanging rock climbs. If you are looking for more control over your climb, then these shoes work best.
Climbing Shoe Outsoles
Every climbing shoe has a multi-level sole. In some cases, it’s simply a midsole and an outsole, but in other shoes, you’ll only have an outsole, depending on how thin the shoe is built. Here is a brief guide to understanding how the outsole supports your shoe and which one to pick.
Rubber Outsole: These shoes use rubber on the outside of the shoe. This provides a great grip, but some rubbers are not as high quality and may get sticky or soft. Firm rubbers are going to provide the most support for your foot as you climb on edges. Cheaper climbing shoes may use a thinner rubber that will wear down over time.
Thick Outsole: You want an outsole that is going to help you grip and hold onto edges as you climb. The thickness of the outsole may challenge your performance if it’s too thin. Most thick soles range from 4 mm to 6 mm. These offer great support and durability for the long-term climber. However, you won’t have the same sensitivity with a thinner rubber sole if you pick a thicker outsole.
You should train your footwork properly before deciding on a thicker outsole.
Thin Outsole: There are some benefits with a thinner outsole. These are typically between 3mm and 4mm thick. If you like to smear on slab routes, this is the climbing shoe for you. As you get better at your footwork and technique, you might like a thinner outsole because it allows you to feel the rock’s edges as you climb.
Related Post:
How to Choose Rock Climbing Shoes
FAQs About Climbing Shoe Fit, Size, and Shape
Where can I find climbing shoes for women?

Climbing shoes for women* typically follow the same fits above, but if they are specifically designed for women, you may notice a lower ankle and smaller heel. These shoes are also typically narrower to fit the female foot. These shoe fits are also better suited for low-volume feet shapes, so if you have a low arch, these shoes are a great fit.
Where can I find climbing shoes for kids?

Most rock climbing gyms allow you to rent out climbing shoes, which may be best at first, but if your child has a thirst to climb, then you’ll want to get their own gear. Kids climbing shoes* are smaller and tighter, so you should fit them one size too big as children will want a relaxed fit and they’ll grow into the shoes. Rip and stick closures also work best with children if they have difficulty tying up their shoes.
How do you know what climbing shoe will fit best?
You’ll want to be a little flexible when it comes to size, and you may need to try climbing shoes on first before finding the right fit. Since there isn’t a standard, it’s really about the fit and type of climber. Everybody’s feet have different shapes, so the same rules that apply to one climbing shoe type aren’t going to apply to you.
There are also different shoe sizes depending on where the shoes are made. For example, you may like a European brand that uses different sizing. You’ll need to check a comparison chart to find the US size.
Rock climbing shoes should never put you in so much pain that you can’t walk or climb. If this is the case, they are probably too tight or too asymmetrical. If you notice that you’re getting bunions, blisters, bruises, and calluses whenever you wear your climbing shoes, you should find a better shoe for comfort.
The most important thing to remember is that you get the most performance out of a climbing shoe when your toes are slightly bent right at the knuckle. The rubber piece that goes around the shoe is called a slingshot heel rand and that becomes tighter as your foot pushes down into the shoe. This ensures that your toes have a lot of grip and can remain in a curved-to-crimped position.
Related Post:
How are Rock Climbing Shoes supposed to Fit?
What are some things to avoid when shopping for climbing shoes?
- Never buy a shoe that has a lot of space between your toes and the inside of the shoe, because that means the shoe won’t be stiff enough to get a foothold on an edge as you climb.
- If you put on a shoe, and it bunches up your knuckles so tightly that you immediately feel pain, you will have an even rougher time at the gym or on a climbing route. These are shoes you avoid.
- When you stand on your toe in the shoe during a try-on and the shoe pinches the bottom of your Achille’s tendon, it’s guaranteed to get more uncomfortable. However, the heel should have a snug fit that doesn’t cut into the back of your heel.
- If you can’t slip the shoe easily on your foot, it’s going to be more difficult in the field to slip in and out of shoes when you need a break.
Attention: You have to take care of your safety when climbing! The information on climbtheearth.com only helps you to learn. Before you climb, you should make sure that you have been properly instructed by an expert and that you follow all safety precautions.
Disclosure: This website is the property of Martin Lütkemeyer and is operated by Martin Lütkemeyer. Martin Lütkemeyer is a member of the Amazon Services LLC Affiliate Program, an affiliate advertising program designed to enable Web sites to earn advertising revenue through advertising and linking to Amazon.com. Links marked with * are affiliate links.
